

Herbal preparation methods explained: a practical guide
The six core methods of herbal preparation are infusion, decoction, maceration/tincture, oil infusion/salve, syrup/oxymel, and poultice or compress. Each one suits a different plant part and solvent, and choosing the wrong method often means leaving the most useful constituents behind in the plant material.
Here is the one-line rule for each:
- Infusion (tea/tisane): delicate leaves, flowers and soft stems steeped in hot or cold water; preserves volatile oils and flavonoids.
- Decoction: roots, bark, seeds and tough woody material simmered in water until cell walls break down.
- Maceration/tincture: plant material soaked in alcohol (or glycerin/vinegar for alcohol-free versions) to extract resins, alkaloids and hydrophobic constituents.
- Oil infusion/salve: plant material infused into a carrier oil for fat-soluble, skin-active constituents; thickened with wax to make a salve.
- Syrup/oxymel: a water extract combined with honey or sugar (and vinegar for an oxymel) to improve palatability and extend shelf life.
- Poultice/compress: fresh or dried plant material applied directly to the skin for localised relief.
Safety note: herbal preparation variability is well documented, and potency can differ significantly between batches. Always check interactions with prescription medicines via the NHS or a pharmacist, and consult the MHRA’s guidance if you intend to sell or share preparations. Vulnerable groups — including pregnant women, children, and older adults — should seek clinical advice before using herbal remedies.
TL;DR: Make a tea for delicate flowers; simmer roots for strength; use a tincture for shelf stability.
Pro Tip: Cover your infusion while it steeps. Volatile oils — the compounds responsible for much of the therapeutic and aromatic character of herbs like chamomile and peppermint — escape with steam if the cup is left open.
Table of Contents
- Which method suits your herb? A side-by-side comparison
- How to make an infusion: the right way for leaves and flowers
- Why decoctions work differently: simmering roots, bark and seeds
- Tinctures and glycerites: concentrated extracts that last
- Oil infusions, salves and topical preparations
- Syrups and oxymels: making herbal remedies people will actually take
- Poultices and compresses: direct plant application for local relief
- How to harvest, dry and store herbs for the best results
- Why solvent choice changes everything: a simple phytochemistry guide
- Dosage, concentration, shelf life and labelling
- Safety, contraindications and UK regulatory context
- Five starter recipes to try at home
- Key takeaways
- Why simple, repeatable methods matter most
- Useful sources and further reading
Which method suits your herb? A side-by-side comparison
| Method | Best for (plant part) | Solvent used | Time required | Potency | Ease for beginners | Typical shelf life |
|---|---|---|---|---|---|---|
| Hot infusion | Leaves, flowers, soft stems | Water | 5–15 min steep | Low–medium | Very easy | 24–48 hours (refrigerated) |
| Cold infusion | Mucilage-rich herbs (marshmallow root, slippery elm) | Cold water | 4–8 hours | Medium | Easy | 24–48 hours (refrigerated) |
| Decoction | Roots, bark, seeds, berries | Water | 20–60 min simmer | Medium–high | Moderate | 48–72 hours (refrigerated) |
| Tincture | Most plant parts; especially resins, roots | Alcohol (40–70% ABV) | 2–6 weeks maceration | High | Moderate | 2–5 years |
| Glycerite | Leaves, flowers; children’s formulas | Vegetable glycerin + water | 4–6 weeks | Medium | Moderate | 1–2 years |
| Oil infusion | Flowers, leaves (fat-soluble constituents) | Carrier oil | 4–6 weeks (cold) or 2–4 hours (warm) | Medium | Easy | 6–12 months |
| Salve | Topical use from infused oil | Carrier oil + beeswax | As above + 10 min | Medium | Easy | 6–12 months |
| Syrup | Demulcents, expectorants, bitter herbs | Water + sugar/honey | 30–60 min | Medium | Easy | ~1 month (refrigerated) |
| Oxymel | As syrup; particularly respiratory herbs | Vinegar + honey | 30–60 min | Medium | Easy | 1–2 months (refrigerated) |
| Poultice/compress | Fresh or dried plant material, topical | Water (compress) or none (poultice) | Minutes to apply | Immediate local | Very easy | Use fresh each time |
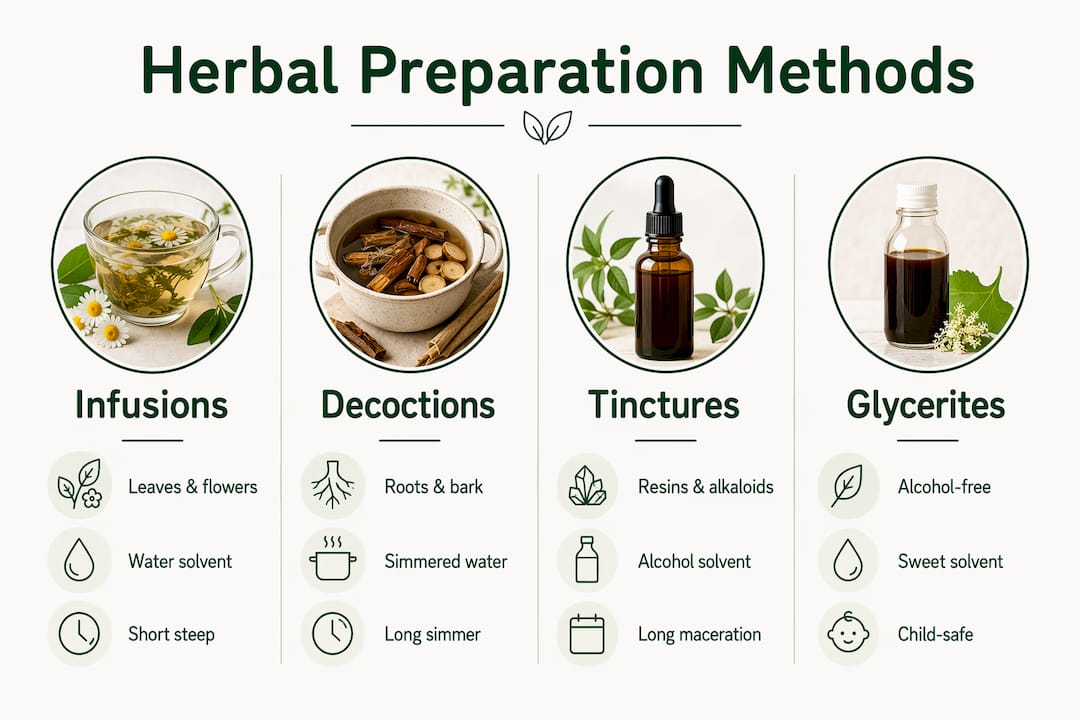
Pro Tip: Choose water when your herb is mucilage-rich (marshmallow, slippery elm, linseed) — alcohol actually precipitates mucilage rather than extracting it. Choose alcohol when you need a long shelf life or when the active constituents are resinous or alkaloid-based.
How to make an infusion: the right way for leaves and flowers
Infusions are the preferred method for delicate plant parts because they extract volatile oils, flavonoids and water-soluble vitamins without prolonged heat. The moment you boil a chamomile flower for ten minutes, a significant portion of its aromatic compounds has already left the building.
What an infusion actually extracts
Hot water draws out water-soluble constituents: volatile oils (while they last), flavonoids, water-soluble vitamins, glycosides and mucilage. Cold or room-temperature water is gentler still, and is the better choice for mucilage-rich herbs where heat can degrade the gel-like compounds you are trying to preserve.
Step-by-step: basic hot infusion
- Bring fresh, filtered water to approximately 90–95°C (just off the boil for most herbs; green tea logic applies here too).
- Measure your herb: use 1 teaspoon of dried herb (roughly 2–3 g) per 250 ml of water, or 2–3 teaspoons of fresh herb for the same volume. Fresh herb contains significantly more water, so you need roughly twice the volume to match dried.
- Place the herb in a warmed teapot or mug with a lid, or use a tea strainer.
- Pour the hot water over the herb. Cover immediately to trap volatile oils.
- Steep for several minutes for most leaf and flower herbs. Stronger medicinal infusions can steep longer to increase potency.
- Strain thoroughly and drink while warm, or allow to cool for a cold infusion.
Step-by-step: cold or long infusion
- Place 1–2 tablespoons of dried herb per 500 ml of cold, filtered water in a clean glass jar.
- Seal the jar and leave at room temperature or in the fridge for 4–8 hours (overnight works well).
- Strain and use within 24 hours.
Cold infusions are particularly suited to marshmallow root, slippery elm bark and linseed, where the goal is mucilage rather than volatile oils.
Practical notes:
- Use glass or ceramic vessels; avoid plastic for hot preparations.
- Filtered or spring water produces a cleaner-tasting infusion than heavily chlorinated tap water.
- Fresh-to-dried conversion: as a general rule, use three times the volume of fresh herb compared to dried, because fresh herb is roughly 70–80% water by weight.
- Consume within 24–48 hours if refrigerated; infusions carry no preservative and spoil quickly.
Pro Tip: For a stronger medicinal infusion (sometimes called a nourishing herbal infusion), steep 25–30 g of dried herb per litre of water for 4–8 hours in a sealed jar. This is the method traditionally used for mineral-rich herbs like nettle and oatstraw.
Why decoctions work differently: simmering roots, bark and seeds
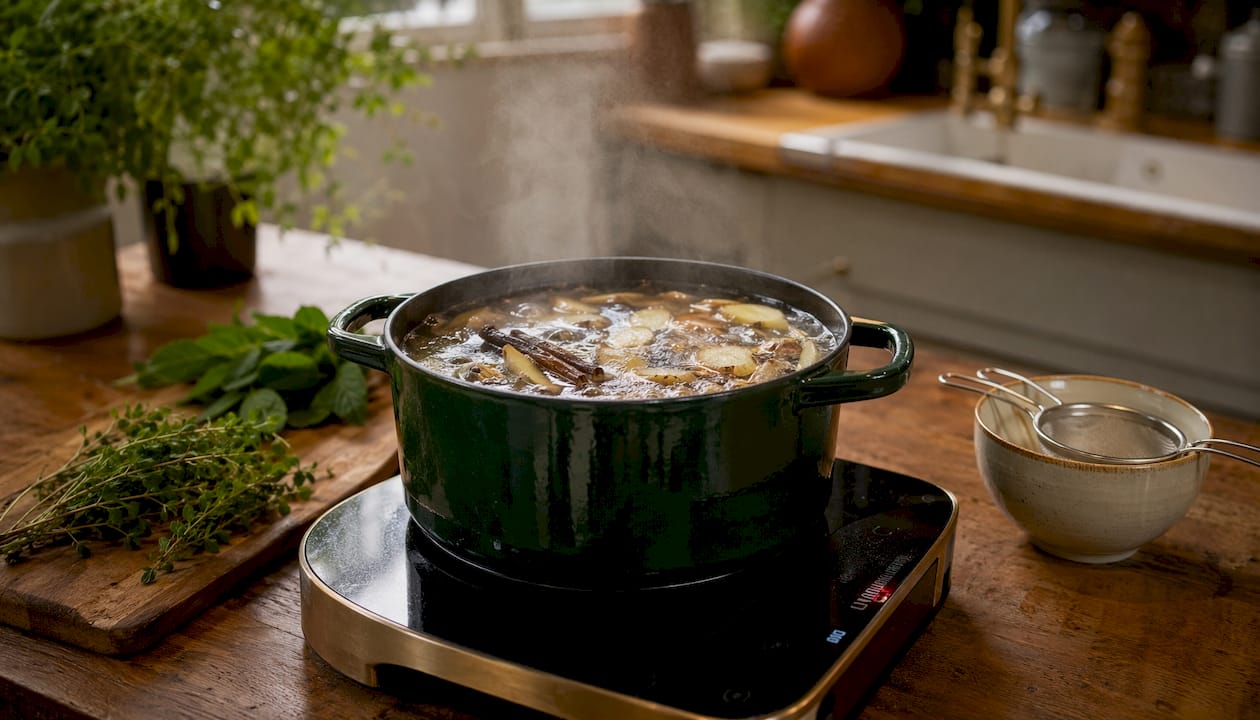
Roots, bark and seeds have one thing in common: tough cell walls that hot water alone cannot penetrate quickly. Polysaccharides, tannins and some alkaloids locked inside woody tissue need sustained heat to release. That is the mechanical reason a decoction works where a simple steep does not.
The decoction process
Start by breaking or chopping your plant material into smaller pieces. Finely chopped or lightly crushed material increases surface area and shortens extraction time. Place the herb in a stainless steel or enamel saucepan (avoid aluminium and uncoated cast iron, which can react with tannins and alter both flavour and chemistry). Use 1 tablespoon of dried root or bark per 500 ml of cold water, then bring slowly to a gentle simmer.
Simmer times vary by material: soft roots like ginger need only 20 minutes, while harder barks and dried berries benefit from 40–60 minutes. Keep the lid slightly ajar to allow some steam to escape and prevent the liquid from becoming too concentrated too quickly. The goal is a reduction to roughly half the original volume for a standard decoction, or to one quarter for a concentrated version.
Once simmered, strain immediately through a fine mesh sieve or muslin cloth. A concentrated decoction is typically diluted before drinking: one part concentrate to two or three parts warm water, depending on the herb and the intended dose. Ginger decoction, for example, is pleasant at full strength; liquorice root concentrate is intensely sweet and almost always diluted.
Common mistakes are easy to make. Over-boiling drives off volatile compounds that survived the initial simmer. Reducing the liquid too far produces a bitter, astringent result that most people will not take consistently. Metallic pans genuinely do affect flavour and can introduce unwanted compounds, so stainless steel is the practical default.
Store decoctions in the fridge and use within 48–72 hours. They do not keep as long as tinctures, but they are far more accessible for a beginner working with kitchen equipment.
Pro Tip: If your decoction tastes unpleasantly bitter, add a small piece of liquorice root or a cinnamon stick during the last 10 minutes of simmering. Both improve palatability without significantly altering the therapeutic profile.
Tinctures and glycerites: concentrated extracts that last
A tincture is simply plant material macerated (soaked) in a solvent, typically alcohol, to extract and preserve its active constituents. The alcohol serves two roles simultaneously: it pulls out resins, alkaloids, essential oils and other hydrophobic compounds that water cannot reach, and it acts as a preservative that gives the finished product a shelf life measured in years rather than days.
Which plant parts benefit most from alcoholic extraction
Resins (myrrh, frankincense), alkaloids (berberine-containing herbs like goldenseal), and fat-soluble or hydrophobic constituents are the primary targets. Roots, bark and seeds that also contain these compounds often benefit from a tincture rather than a decoction, particularly when long-term storage is a priority.
Tincture ratio chart
| Herb form | Herb:menstruum ratio | Alcohol strength | Maceration time |
|---|---|---|---|
| Dried herb (general) | 1:5 | 40–50% ABV | 4–6 weeks |
| Fresh herb (high water content) | 1:2 | 60–70% ABV | 4–6 weeks |
| Resins and gums | 1:5 | 70–90% ABV | 2–4 weeks |
| Dried roots/bark | 1:5 | 50–60% ABV | 4–6 weeks |
Stable tinctures generally require at least 40% ABV (roughly 80 proof). Vodka at 40% ABV is the most practical choice for UK home makers: it is widely available, relatively neutral in flavour and sits at the right strength for most dried-herb preparations.
Alcohol-free alternatives: glycerites and vinegars
Glycerites suit children, people avoiding alcohol and anyone who finds tinctures too harsh. Vegetable glycerin is sweet, viscous and a reasonable solvent for water-soluble and some moderately hydrophobic constituents, though it does not extract resins as effectively as alcohol.
A critical step that many beginners skip: rehydrate dried herbs before adding glycerin. Soak the dried herb in a small amount of water for 30–60 minutes first, then combine with glycerin at a ratio of 75% vegetable glycerin to 25% water for dried-herb glycerites. This ratio maintains adequate preservation while allowing the glycerin to penetrate the now-softened plant tissue.
Apple cider vinegar works as a third alternative, particularly for mineral-rich herbs like nettle and dandelion. It extracts minerals and some alkaloids reasonably well, though its shelf life (6–12 months) is shorter than an alcohol tincture.
Alcohol handling notes for UK readers:
- Homemade tinctures for personal use are legal in the UK; selling alcohol-based preparations commercially triggers HMRC and MHRA considerations.
- Store alcohol tinctures in dark glass bottles, away from heat and direct light.
- Label clearly with herb name, alcohol percentage, preparation date and suggested dose.
Pro Tip: When making a 1:5 dried-herb tincture, weigh your herb first. For every 100 g of dried herb, you need 500 ml of menstruum (solvent). Measuring by volume rather than weight is the most common source of inconsistent results.
Oil infusions, salves and topical preparations
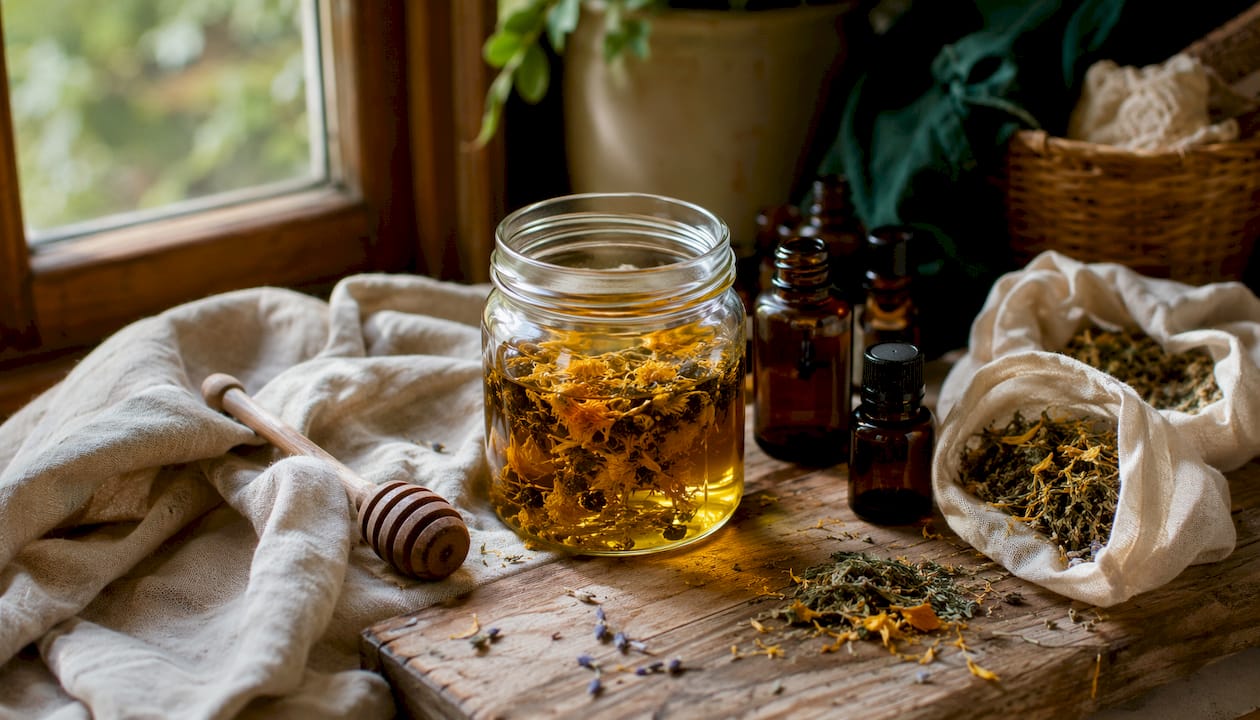
An oil infusion transfers fat-soluble plant constituents into a carrier oil, making them available for topical application. Fat-soluble compounds — including some carotenoids, fat-soluble vitamins and certain anti-inflammatory constituents — simply do not dissolve in water, which is why a tea of calendula flowers does far less for the skin than a calendula-infused oil.
Choosing your carrier oil
Lighter oils like jojoba and sweet almond absorb quickly and suit facial preparations. Olive oil is heavier, more stable and traditionally used for salves and body preparations. Sunflower oil sits in the middle: affordable, light and a good all-purpose base. Match the carrier to the intended use rather than to the herb.
Cold maceration method
Fill a clean, dry glass jar loosely with dried herb (fresh herb introduces water, which promotes mould). Pour your chosen carrier oil over the herb until fully submerged, leaving about 2 cm of oil above the plant material. Seal the jar and leave it in a warm, sunny spot for 4–6 weeks, shaking gently every few days. Strain through muslin, pressing the plant material firmly to extract as much oil as possible. The resulting infused oil keeps for 6–12 months in a cool, dark place.
Gentle heat method
Place herb and oil in a double boiler or slow cooker on the lowest setting with gentle heat; avoid overheating to prevent degradation and burning. Maintain this heat for a few hours, then strain and cool. This method suits beginners who want results quickly, though the cold method is generally considered superior for preserving delicate compounds.
Making a salve
For a basic salve, melt 25–30 g of beeswax per 250 ml of infused oil in a double boiler. Stir until fully combined, then pour into clean tins or glass jars immediately before it sets. The wax-to-oil ratio determines firmness: more wax gives a stiffer product, less gives a balm-like consistency. A simple test: place a small amount on a cold spoon; if it sets too hard, add a little more oil; if too soft, add more wax.
For topical herbal therapy, always perform a patch test before applying a new preparation to a large area of skin.
Patch test procedure: Apply a small amount of the finished oil or salve to the inner forearm. Leave uncovered for 24–48 hours. Redness, itching, swelling or a rash indicates sensitisation — discontinue use. Even herbs with a long history of topical use (calendula, comfrey) can cause reactions in individuals with plant allergies, particularly those sensitive to the Asteraceae (daisy) family.
Pro Tip: Add a few drops of vitamin E oil (tocopherol) to your finished infused oil before storing. It acts as a natural antioxidant and can extend shelf life by several months.
Syrups and oxymels: making herbal remedies people will actually take
The most potent preparation in the world is useless if nobody takes it. Syrups and oxymels exist precisely to solve that problem: they make bitter, astringent or simply unpleasant herbs palatable enough for consistent use. Honey and sugar both act as preservatives as well as flavour agents, which is why these forms have been used across cultures for centuries.
Herbs that suit syrups particularly well include demulcents (marshmallow, slippery elm), expectorants (thyme, elecampane, mullein) and strongly bitter herbs that need masking (horehound, yarrow).
Simple herbal syrup: step-by-step
- Make a strong herbal infusion or decoction: use 30 g of dried herb per 500 ml of water, steep or simmer as appropriate, then strain.
- Measure the liquid. Add an equal volume of raw honey or granulated sugar (1:1 ratio by volume).
- Warm gently over low heat, stirring until the sweetener is fully dissolved. Do not boil.
- Pour into sterilised glass bottles while still warm. Seal immediately.
- Refrigerate. A simple syrup made this way lasts approximately one month in the fridge. Yield from 500 ml of infusion is roughly 750–800 ml of finished syrup after adding the honey or sugar.
Oxymel: step-by-step
- Prepare a strong herbal infusion or decoction as above.
- Combine equal parts raw apple cider vinegar and raw honey in a separate bowl.
- Mix the cooled herbal liquid with the vinegar-honey blend at a ratio of 1 part herbal liquid to 2 parts vinegar-honey mixture.
- Bottle in sterilised glass, refrigerate and use within 1–2 months.
Oxymels are particularly well suited to respiratory herbs: thyme, hyssop and elecampane all work well. The vinegar adds a pleasant sharpness that balances the sweetness of the honey.
Age and safety notes: Do not give honey-based preparations to children under 12 months due to the risk of infant botulism. For older adults on blood-thinning medication, check interactions before using elderberry or other high-flavonoid syrups with a pharmacist.
Troubleshooting: If your syrup crystallises, warm the bottle gently in a bowl of hot water. Fermentation (bubbling, off-odour) means the sugar concentration was too low or the preparation was not refrigerated promptly; discard and start again. An off or rancid smell in an oxymel usually indicates the vinegar was not acidic enough (use vinegar with at least 5% acidity).
Pro Tip: Sterilise your bottles by running them through a hot dishwasher cycle or submerging in boiling water for 10 minutes. A clean bottle is the single most effective way to extend shelf life.
Poultices and compresses: direct plant application for local relief
A poultice is fresh or dried plant material applied directly to the skin, usually held in place with a cloth. A compress is a cloth soaked in a strong herbal infusion or decoction and applied to the affected area. Both deliver plant constituents directly to the site of concern without any systemic absorption, which makes them among the safest preparations for most adults.
Common use cases include bruises, minor sprains, muscle aches, small superficial wounds and localised inflammation. Plantain leaf, comfrey leaf, cabbage leaf and grated ginger are among the most traditionally used poultice materials in the UK.
Preparing and applying a fresh-plant poultice
Wash the plant material and your hands thoroughly. Bruise or crush the leaves using a mortar and pestle, the back of a spoon, or simply by chewing (a traditional field method). Apply the bruised material directly to clean, unbroken skin. Cover with a clean cotton cloth or gauze to hold it in place and protect clothing. Leave for 15–30 minutes, then remove and rinse the skin. Reapply with fresh material if needed, up to three times daily.
For a dried-herb poultice, rehydrate the herb in a small amount of warm water until it forms a paste, then apply as above.
Contraindications: Never apply a poultice to broken, infected or severely inflamed skin without clinical guidance. Signs of infection (increasing redness, warmth, pus, fever) require medical attention, not a poultice. People with known plant allergies, particularly to the Asteraceae family, should avoid comfrey, arnica and related herbs topically. If you are exploring holistic pain management more broadly, topical herbal applications work best as part of a considered approach rather than as a standalone treatment for significant pain.
Troubleshooting tips:
- If the poultice dries out quickly, dampen the covering cloth with warm water.
- Always place a single layer of thin cloth between a hot compress and the skin to prevent scalding.
- Redness or itching that develops within minutes of application suggests contact sensitisation; remove immediately and wash the area with cool water.
Pro Tip: A ginger poultice for muscle aches should feel warming, not burning. If the heat becomes uncomfortable within five minutes, remove it and apply a cloth barrier between the ginger and skin on the next application.
How to harvest, dry and store herbs for the best results
The quality of any herbal preparation is determined before the first drop of water or alcohol is added. Poor raw material produces poor medicine, regardless of how carefully you follow a recipe.
Harvesting checklist:
- Harvest leaves and flowers in the morning, after the dew has dried but before the heat of the day drives off volatile oils.
- Pick flowers at or just before peak bloom; leaves before the plant flowers (when energy is still in the foliage).
- For roots, harvest in autumn or early spring when the plant’s energy has returned to the root.
- Wild harvesting: take no more than 10% of any stand, avoid protected species, and be certain of your identification before picking anything.
- Use clean, dry hands and clean tools; contamination at harvest carries through to the finished preparation.
Drying methods
Air drying suits most leafy herbs and flowers: tie small bundles loosely and hang upside down in a warm, well-ventilated space away from direct sunlight. Most herbs dry adequately in 1–2 weeks at room temperature.
A food dehydrator gives more control: set to 35–40°C for delicate leaves and flowers, 50–55°C for roots and bark. Oven drying on the lowest setting (usually 50–60°C) works in a pinch, but the temperature is harder to control and can degrade volatile oils.
Fresh-to-dried weight conversion generally varies by plant part, with leaves and flowers requiring significantly more fresh weight than roots, bark, or berries to make an equivalent dried amount.
Storage guidelines
Store dried herbs in airtight glass jars, away from light, heat and humidity. Label every jar with the herb name, harvest date and batch number. Most dried herbs retain useful potency for 1–2 years when stored correctly; roots and bark often last longer than leaves and flowers.
Adulteration and misidentification are genuine risks when sourcing commercially. Buy from suppliers who provide batch testing, country of origin and ideally third-party quality certification. Visual inspection (colour, aroma, texture) is a basic but useful first check: dull colour, weak aroma and powdery texture all suggest degraded or adulterated material.
Why solvent choice changes everything: a simple phytochemistry guide
Think of choosing a solvent the way a chef thinks about choosing a cooking medium. Fat carries fat-soluble flavour compounds; water carries water-soluble ones. The same logic applies to plant constituents, and matching solvent to constituent is the single most important decision in any extraction.
Solvent mapping:
- Water extracts: mucilage, tannins, water-soluble glycosides, water-soluble vitamins, some alkaloids. Best for: leaves, flowers, mucilaginous roots.
- Alcohol (40–70% ABV) extracts: resins, most alkaloids, essential oils, some tannins, glycosides. Best for: resins, roots, bark, seeds.
- Oil (carrier oil) extracts: fat-soluble constituents, carotenoids, some fat-soluble vitamins, lipophilic anti-inflammatory compounds. Best for: flowers (calendula, St John’s wort), leaves with waxy cuticles.
- Vegetable glycerin extracts: water-soluble constituents and some moderately hydrophobic compounds; does not extract resins effectively. Best for: flowers, leaves; children’s preparations.
- Vinegar (apple cider, 5% acidity) extracts: minerals, some alkaloids, water-soluble constituents. Best for: mineral-rich herbs (nettle, dandelion, horsetail).
Constituent-to-method examples:
- Calendula flowers: oil infusion for anti-inflammatory carotenoids; hot infusion for flavonoids.
- Ginger root: decoction for gingerols and shogaols; tincture for longer shelf life.
- Marshmallow root: cold-water infusion for mucilage (heat degrades it); avoid alcohol.
- Myrrh resin: high-alcohol tincture (70%+ ABV); water barely touches it.
Heat sensitivity is a real concern. Vitamin C degrades rapidly above 70°C; volatile aromatic compounds begin to escape at simmering temperatures. For herbs where these constituents are the primary goal, cold infusion or room-temperature maceration preserves far more than any heated method. The antioxidant constituents in many herbs are among the most heat-sensitive, which is worth bearing in mind when choosing between a decoction and a tincture for the same root.
Pro Tip: When you are unsure which solvent to use, ask what the active constituent is likely to be. Resinous, sticky, strongly aromatic? Reach for alcohol. Slimy or gel-like when wet? Use cold water. Deeply coloured flowers? Try oil.
Dosage, concentration, shelf life and labelling
A preparation without a label is a preparation waiting to cause a problem. Memory is unreliable; a jar of unlabelled dark liquid in the fridge is indistinguishable from last month’s batch or someone else’s preparation entirely.
Label template
Every homemade preparation should carry:
- Product name (e.g. “Chamomile & Lemon Balm Tincture”)
- Herb(s) and quantity (e.g. “30 g dried chamomile, 150 ml 40% vodka”)
- Preparation date and batch number
- Solvent and concentration (e.g. “1:5, 40% ABV”)
- Suggested dose (e.g. “2–4 ml in water, up to three times daily”)
- Storage instructions (e.g. “Store in a cool, dark place”)
- Allergy warnings (e.g. “Contains alcohol. Asteraceae family.”)
Shelf-life reference
| Preparation | Typical shelf life | Storage |
|---|---|---|
| Hot infusion / tea | 24–48 hours | Refrigerated |
| Decoction | 48–72 hours | Refrigerated |
| Tincture (40%+ ABV) | 2–5 years | Cool, dark, sealed |
| Glycerite | 1–2 years | Cool, dark, sealed |
| Vinegar extract | 6–12 months | Refrigerated |
| Oil infusion | 6–12 months | Cool, dark, sealed |
| Salve | 6–12 months | Cool, dark, sealed |
| Simple syrup | ~1 month | Refrigerated |
| Oxymel | 1–2 months | Refrigerated |
Concentration and dose conversion
A standard 1:5 tincture means 1 part herb by weight to 5 parts menstruum by volume. To make 100 ml of a 1:5 dried-herb tincture: weigh out 20 g of dried herb and add 100 ml of your chosen alcohol. After 4–6 weeks of maceration and straining, you will have approximately 80–90 ml of finished tincture (some liquid is absorbed by the plant material).
A typical adult dose for a 1:5 tincture is 2–4 ml, two to three times daily, though this varies considerably by herb and individual. If you later make a more concentrated 1:3 preparation, halve the volume dose to maintain the same herb equivalent.
Batch logs are worth the two minutes they take. Record the herb source, harvest or purchase date, preparation method, ratios, maceration time and any observations about the finished product. This is how repeatable, reliable preparations are built over time, and it is the same principle that underpins a safe herbal detox workflow.
Pro Tip: Use a permanent marker on masking tape for labels on glass jars — it is cheap, repositionable and survives condensation far better than printed paper labels.
Safety, contraindications and UK regulatory context
Home preparation is practical and accessible, but it carries real responsibilities. The variability in herbal product composition means that two batches of the same preparation can differ meaningfully in potency, and that difference matters when someone is also taking prescription medication.
Safety checklist for home preparation:
- Confirm the identity of every herb before use; misidentification is among the most serious risks in home herbalism.
- Use clean, dry equipment throughout; moisture in dried herb storage promotes mould.
- Follow established ratios and do not assume that more herb means more benefit.
- Label every preparation before storing it.
- Check for interactions with any prescription or over-the-counter medicines; St John’s wort, for example, is a well-documented inducer of CYP450 enzymes and interacts with a wide range of drugs including antidepressants, anticoagulants and oral contraceptives.
Red flags and contraindications:
- Pregnancy and breastfeeding: many herbs are contraindicated; always consult a midwife, GP or qualified medical herbalist before use.
- Children: doses differ significantly from adult doses; honey-based preparations are unsafe under 12 months; seek professional guidance.
- Older adults: polypharmacy is common; herb-drug interactions are a genuine concern; consult a pharmacist.
- Allergic history: anyone with known plant allergies, particularly to the Asteraceae or Apiaceae families, should approach new herbs cautiously and patch test topical preparations.
UK regulatory context: In the UK, the MHRA regulates herbal medicines under the Traditional Herbal Medicines Registration (THMR) scheme. A product sold or supplied as a medicinal product requires registration or a licence; food supplements are regulated differently under food law. If you intend to sell herbal preparations, seek MHRA guidance before doing so. The NHS provides safety information on commonly used herbs at nhs.uk, and this is the most practical starting point for UK readers checking interactions or safety data.
Contamination risks: Heavy metals, pesticide residues and mould are the primary contamination concerns in herbal preparations. Buy from suppliers who test for these, dry herbs thoroughly before storage, and discard any material that shows signs of mould, unusual colour change or off-odour. WHO guidelines on good herbal processing practice set out the standards that professional producers follow, and they provide a useful benchmark for home makers assessing their own processes.
General information notice: This article is general educational information, not medical or professional advice. Always confirm current guidance with the NHS, MHRA or a qualified clinician for your own situation, particularly if you are pregnant, taking prescription medicines or preparing remedies for children or older adults.
Five starter recipes to try at home
These five recipes are designed to be reproducible with standard kitchen equipment. Each one uses a single herb or a simple combination so you can observe the results clearly before moving to more complex blends. For guidance on how herbalists formulate blends, the principles here form the foundation.
Recipe 1: Calming chamomile infusion
Equipment: Teapot or mug with lid, fine strainer. Ingredients: 2 teaspoons (4–5 g) dried chamomile flowers, 250 ml water at 90°C.
- Warm the teapot with a splash of hot water; discard.
- Add chamomile flowers to the pot or a strainer.
- Pour 90°C water over the flowers. Cover immediately.
- Steep for 8–10 minutes.
- Strain and drink warm.
Yield: 1 cup. Storage: Drink fresh; does not keep. Dose: 1–3 cups daily.
Recipe 2: Ginger root decoction
Equipment: Small stainless steel saucepan, fine sieve. Ingredients: 1 tablespoon (8–10 g) freshly sliced or dried ginger root, 500 ml cold water.
- Combine ginger and cold water in the saucepan.
- Bring to a gentle simmer over medium heat.
- Simmer uncovered for 20–25 minutes until reduced to approximately 350 ml.
- Strain and drink warm, with honey if desired.
Yield: approximately 350 ml. Dose: 1 cup, up to three times daily. Storage: Refrigerate; use within 48 hours.
Recipe 3: Simple dried-herb tincture (1:5, 40% ABV)
Equipment: Clean glass jar with lid, muslin cloth, dark glass bottle. Ingredients: 20 g dried herb of choice (e.g. lemon balm, valerian root), 100 ml 40% vodka.
- Place dried herb in the glass jar.
- Pour vodka over the herb; ensure it is fully submerged.
- Seal the jar and store in a cool, dark place.
- Shake gently every 2–3 days.
- After 4–6 weeks, strain through muslin, pressing firmly.
- Pour into a dark glass bottle and label immediately.
Yield: approximately 80–90 ml. Dose: 2–4 ml in a small amount of water, up to three times daily. Shelf life: 2–5 years.
Recipe 4: Cold calendula oil infusion and salve
Equipment: Clean glass jar, muslin cloth, double boiler, small tins or jars. Ingredients (oil infusion): 30 g dried calendula flowers, 200 ml sunflower or olive oil. Ingredients (salve): 200 ml infused oil, 20–25 g beeswax pellets.
Oil infusion:
- Fill the jar loosely with dried calendula flowers.
- Cover completely with oil; leave 2 cm of oil above the flowers.
- Seal and place in a warm, sunny spot for 4–6 weeks, shaking every few days.
- Strain through muslin, pressing well.
Salve:
- Melt beeswax in a double boiler.
- Add infused oil and stir until combined.
- Pour into tins immediately; allow to set at room temperature.
- Perform a patch test before first use.
Yield: approximately 180–190 ml of oil; 8–10 small tins of salve. Shelf life: 6–12 months in a cool, dark place.
Recipe 5: Thyme oxymel for throat support
Equipment: Small saucepan, sterilised glass bottle. Ingredients: 15 g dried thyme, 200 ml water, 100 ml raw apple cider vinegar (5% acidity), 100 ml raw honey.
- Simmer thyme in water for 15 minutes; strain and cool.
- Combine vinegar and honey; stir until blended.
- Mix 100 ml of the cooled thyme decoction with the vinegar-honey blend.
- Bottle in sterilised glass and refrigerate.
Yield: approximately 300 ml. Dose: 1–2 teaspoons as needed. Shelf life: 1–2 months refrigerated. Child safety: not suitable for children under 12 months (honey).
Equipment checklist: digital kitchen scales, glass measuring jug, stainless steel saucepan, fine mesh sieve, muslin cloth, glass jars with lids, dark glass bottles, labels and permanent marker.
Troubleshooting table:
| Problem | Likely cause | Fix |
|---|---|---|
| Tincture is cloudy | Normal; fine particles in suspension | Strain again through finer muslin; cloudiness does not affect quality |
| Oil infusion smells rancid | Moisture in herb or oil; old carrier oil | Discard; use thoroughly dried herb and fresh oil next time |
| Syrup ferments | Low sugar concentration or not refrigerated | Discard; increase sweetener ratio or refrigerate immediately next time |
| Salve too hard | Too much beeswax | Remelt and add more infused oil |
| Decoction too bitter | Over-reduced or over-simmered | Dilute with warm water; add liquorice root next time |
Pro Tip: Start with one recipe and make it three times before moving on. Repetition builds the sensory knowledge (colour, aroma, texture) that tells you whether a batch has worked, far more reliably than any timer.
Key takeaways
Matching the plant part to the right solvent and method is the foundation of effective, safe herbal preparation; everything else follows from that single decision.
| Point | Details |
|---|---|
| Match method to plant part | Delicate leaves and flowers need infusion; tough roots and bark need decoction; resins need high-alcohol tincture. |
| Solvent determines what you extract | Water for mucilage and tannins; alcohol for resins and alkaloids; oil for fat-soluble constituents. |
| Compliance beats theoretical potency | A simple syrup or tea taken consistently outperforms a complex extract that sits unused on the shelf. |
| Label and log every batch | Record herb, ratio, date and dose; potency varies between batches and unlabelled preparations are a safety risk. |
| Check safety before use | Consult the NHS or a pharmacist for interactions, and seek clinical advice for pregnancy, children and older adults. |
Why simple, repeatable methods matter most
There is a tendency in herbal circles to treat complexity as a proxy for quality: the more elaborate the extraction, the more serious the practitioner. After years of working with small-batch botanical preparations, I find the opposite is usually true. The preparations that actually improve people’s wellbeing are the ones they make consistently, week after week, with ingredients they trust and methods they understand.
The research on herbal preparation variability reinforces this. Batch-to-batch inconsistency is one of the most persistent challenges in home herbalism, and the antidote is not a more sophisticated technique. It is careful sourcing, accurate weighing, proper labelling and the discipline to repeat the same method until you know what a good batch looks and smells like. Laboratory extraction methods offer reproducibility through equipment and solvent control that home makers simply do not have access to, which is precisely why standardised laboratory procedures exist as a separate discipline.
At Getgutted, the philosophy behind every product is the same one that should guide home preparation: start with the best raw material, use the method that suits the plant, and make something you will actually take. For readers who want ready-made botanical preparations crafted to those standards, the Getgutted range is built on exactly these principles, with small-batch production and ingredient transparency at its core. But whether you buy or make, the method only works if you use it.
Useful sources and further reading
These are the primary references used throughout this article. They cover regulatory guidance, safety, practical methods and the underlying phytochemistry.
- WHO Guidelines on Good Herbal Processing Practices: The authoritative international standard for herbal processing, covering extraction, drying, storage and quality control. The benchmark for professional and home producers alike.
- Herbal Medicine — NCBI Bookshelf (NIH): Peer-reviewed overview of herbal medicine forms, preparation variability and safety considerations. Cited for the variability data in the safety section.
- Preparation of Medicinal Plants: Basic Extraction and Fractionation Procedures — PMC: Research-level overview of extraction methods from maceration to Soxhlet and ultrasound-assisted techniques; useful for understanding where home methods sit relative to laboratory practice.
- The Basics of Herbal Preparations — Mountain Rose Herbs Blog: Practical beginner’s guide covering glycerites, syrups and the compliance argument for simple methods.
- NHS Herbal Medicine Guidance: The NHS website provides safety information on commonly used herbs and is the most accessible starting point for UK readers checking interactions or contraindications.
- MHRA Traditional Herbal Medicines Registration (THMR): The UK regulatory framework for herbal medicinal products. Consult the MHRA directly if you intend to sell or supply preparations commercially.
- HealthInAging.org — Ask the Expert: Herbal Remedies: Clear overview of preparation forms (infusion, decoction, tincture, extract) with particular relevance for older adults and polypharmacy considerations.
For interactions and vulnerable populations specifically, always consult a GP, pharmacist or qualified medical herbalist rather than relying on any single written source.